The system I'm describing also transfers directly across to the system you would set up if you were lead climbing and had reached the top of your climb.
This blog isn't suitable to read and then put into practice, but rather to read as a back up after having done one of our training courses, or learnt from experienced climbers. It would be highly dangerous to use this blog as an instruction manual without the right training.
1. Be fully geared up well in advance of approaching your set up area.
2. While setting up, face towards the cliff as much as possible, to avoid the possibility of stepping backwards over the edge.

3. Flake out your rope neatly, to the side of your set up area, with both ends clearly visible.
4. Tie into your rope with a re-threaded figure of eight and stopper knot. Once tied, double check your harness is fully fastened!
5. With your back momentarily to the climb, face the back of the set up area and establish a 45 degree angled area for a 'set up zone' where you will look for anchors.
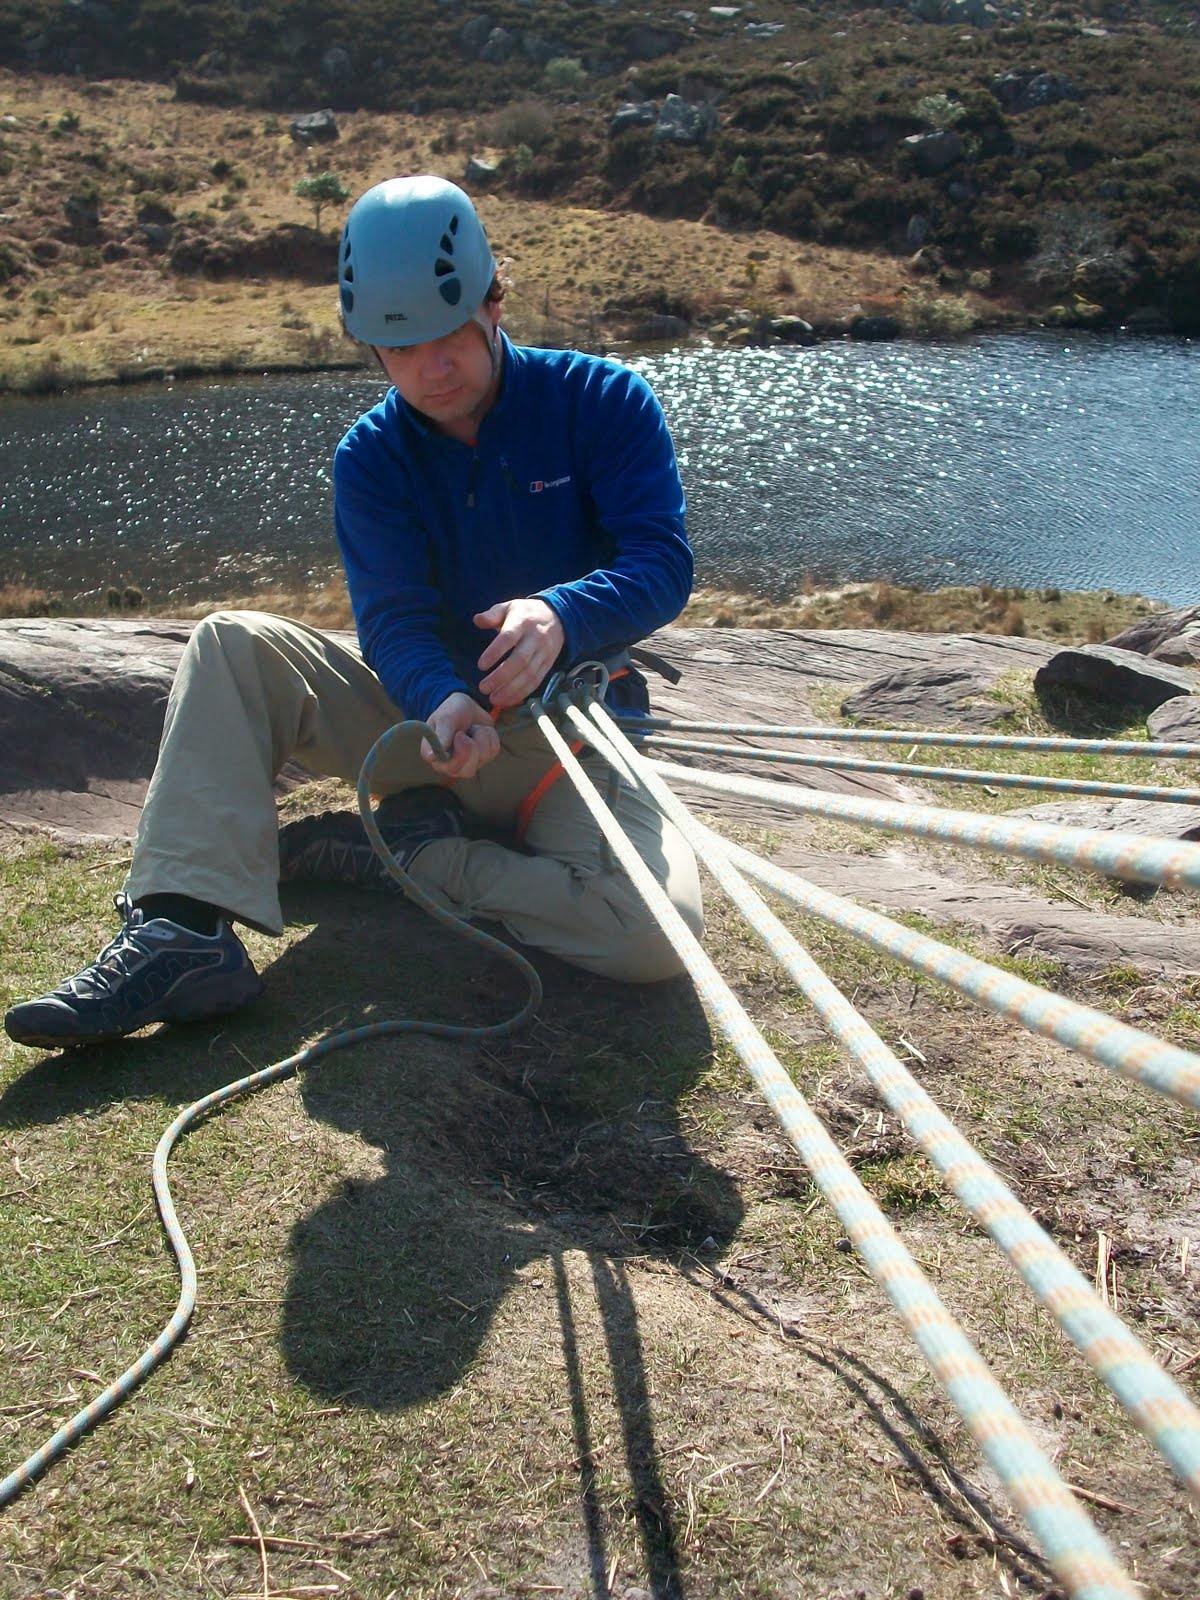
6. Always work with three excellent anchors. If in doubt with one of your anchors, take as much time as you need to find the right ones.

7. The crabs on each anchor should have their wide ends pointing towards the climb and have their screw-gates pointing towards the sky.
8. Take the rope leading from your harness and drop it into the left crab. Screw up the crab.
9. Move towards the climb, allowing the rope to run through your hands. The section of rope moving through your hands towards the crab, you need to clove hitch onto your rope loop with a large crab. Make sure you're clove hitching onto your rope loop and not your harness loop/abseil loop.

10. For a second time, take the rope leading from your harness and drop it into the middle crab. Screw up the crab.
11. Move towards the climb, allowing the rope to run through your hands. The section of rope moving through your hands towards the crab, you need to clove hitch onto your rope loop, with the same large crab. Now screw up this crab also.
12. Although you may feel safe with two anchors clipped onto you, trust and depend on nothing until you have all three anchors clipped onto your rope loop.
13. For a third time, take the rope leading from your harness and drop it into the right crab. Screw up the crab.
14. While you're back at the anchors, check all anchors are still excellent and check the crabs are screwed up.
15. Move towards the climb, allowing the rope to run through your hands. The section of rope moving through your hands towards the crab, you need to clove hitch onto your rope loop, with a separate crab to the first one you used for your clove hitches.
16. You should now be connected to three separate, independent anchors and unable to move anywhere.
17. Sit down at full extension of your rope loops, directly above the climb.
18. You should be one metre away from your climb right now, however the end result needs to be you sitting directly on top of the climb, able to look down the climb and talk to the climber below you. This means you need to, one by one, starting with the last clove hitch you tied, feed slack rope through each clove hitch, allowing you to shuffle forward on your bum until you're in the ideal position.
19. You need to be sitting properly on the ground. Each rope loop behind you needs to be very tight and all three of them need to be equally tensioned. This will take some time to get right.
20. Stop and check; are your anchors still excellent; are your crabs screwed up? are your rope anchor loops equally tensioned; is your harness and rope loop correct; are your clove hitches tightened?
21. Flake what's remaining of your free rope into a small pile beside you.
22. Throw the free end of the rope down the climb to your climber; who will tie into the end of the rope.

23. Put your climber onto belay, which also clips onto your rope loop, on it's own crab. Set up the belay plate so that as you belay you can pass the dead rope out and behind you easily. You should also be able to lock off easily if you need to.
24. Your climbing calls need to be clear and are as follows:
Climber to Belayer: 'Take In'
Climber to Belayer: That's Me'
Belayer to Climber: 'Climb When Ready'
Climber to Belayer: 'Climbing'
25. The rope between belayer and climber needs to be taut at all times, so as belayer you may need to ask your climber to slow their climbing, or even pause for a moment, so you can keep on top of your belaying. Having a slack rope between the two of you is dangerous.
26. Once your climber reaches the top of the climb, get them to move, still on belay, to a safe haven, well back from the cliff and the ropes.
27. Only when you have checked with your climber, and double checked, can you take them off belay. Once you do take them off belay, let them know again that they're off belay.
28. When you're finished with the climb, you can stand up, still connected to all anchors, and move back a safe distance from the cliff.
29. In the reverse order to how you set up the ropes, begin un-clipping the ropes from you and your anchors. Each time you finish with a crab or anchor take if off/out and put it onto a gear loop of your harness, so you lose nothing.
30. As you release slack rope from the system you had set up, your climber can flake the slack rope across to them, keeping it out of your way.


Excellent nathan. Very well documented. Thanks!
ReplyDeleteGreat! Hope it helped.
ReplyDelete